Once you’ve added products to BuyItLive, you may want to edit them to add variants, change prices, upload photos, or adjust inventory. All of the information you included while adding your products can be edited from your inventory list. You can edit your products at any time, including while you’re doing a live sale. Read on to find out how.
Updating Product Information
Edit One-by-One
To update product information such as the product name, code, inventory levels, etc., simply find the product in your inventory list and click on the pencil icon to the far right in the “Edit” column.
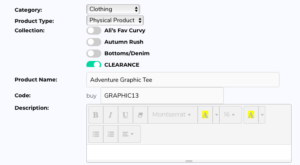
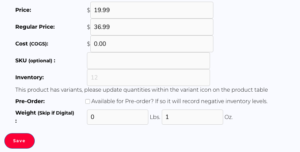 From here, you can update all of the information you originally included while adding your products.
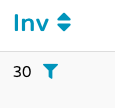
If the product has variants, you won’t be able to edit the quantity from here. Instead, click on the pencil icon in the “Inv” column to edit the quantities you have available for each variant.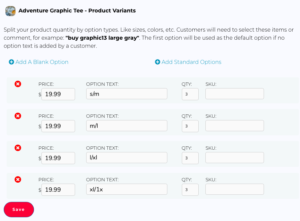
Edit in Bulk
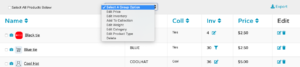
You can also edit the product information all at once for a group of products. By clicking on the white box to the far left of each item, you can select multiple products and then choose an option from the group drop down menu to delete them all, change their prices to match, or even add them all to the same collection.
Adding Products to Collections
Collections are categories for your products that help keep your inventory organized. You can add an entire collection to a sale rather than select products one by one. Collections are also required for your Storefront and help your shoppers find products easily.
If you want to create a new collection, click on the Collections button at the top of the products page. To add a preexisting product to a collection, click on the pencil icon in the “Edit” column and toggle on the collection. To add multiple products to a single collection at once, click on the boxes to the left of each of the products and choose “Add to Collection” from the group dropdown. You can find more details in our article on Collections.
Adding Photos
After creating a new product, go to your products list to add a photo to it. Find the product and then click on the camera icon to the left of it to upload a photo.
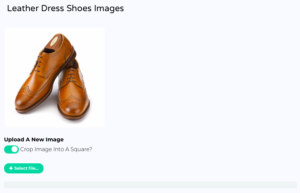
Click the “Select File” button to upload a photo from your device.
Alternatively, you can add an image by dragging and dropping its file onto this interface from your computer. Remember, images you upload or drag and drop must be at least 450px x 450px. If your image doesn’t meet this requirement, you’ll see this message:

Simply fix the sizing and you’ll be able to add your image as desired.
Product Variants
Adding Variants
Variants include different sizes, colors, and/or patterns of the same product. Because they are all connected to the same product, changing variants won’t change the product code. To add variants to a specific item, find the item in your products list and click on the funnel icon in the “Inv” column.
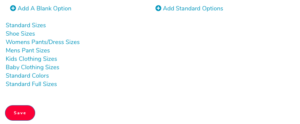
From here, you will be given 2 options: add a blank variant or add a standard variant.
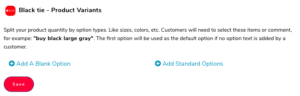
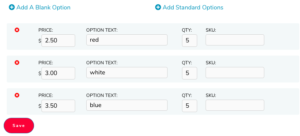
Clicking “Add A Blank Option” adds a single variant and lets you customize the text for the variant. For example, if you have a t-shirt that is available in red, white, and blue, you can add 3 blank option variants and use each color for the text. You will also be able to add the price, quantity, and SKU for each variant. The prices do not need to be the same.
After clicking “Add Standard Options,” you can select standard variants from a list of commonly used sizes. If you choose a standard option, all sizes from that category will be added. For example, I can select “Standard Sizes” and the system will automatically add variants of all the standard clothing sizes from XS to XXXL, after which I can individually adjust prices and inventory levels. I can also add/delete variants one by one.
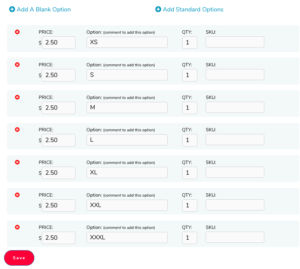
Once you’ve added variants and updated individual variant quantities, the overall inventory of that particular product will automatically update to reflect the total of all the variants. You may need to refresh the page before this change will be shown. If you decide to update quantities later on, you will need to return to this page to do so.
Editing Variants
To add, delete, or simply edit a variant, find the product in your products list and click on the edit icon in the “Inv” column where the funnel icon originally was. From here you can update variant prices and inventory levels. You can also change the text that distinguishes the variant.
Customers can select variants in 2 different ways:
- Customers can comment to buy an item using the item code and then select the variant they want once they enter their cart. This is the most fool-proof way for customers to select variants. The same product code will be used to add the product to a cart and only variants still in stock will be available to claim within the cart.
- Customers can comment the variant along with the product code to add it to their cart. For example, if you have the same shirt in red, white, and blue, a customer can comment “buy coolshirt blue” to claim it directly in the comments. Alternatively, if you have standard sizes as variants, a customer could comment “buy coolshirt small.” Upon entering their cart, the variant that customer commented will already be claimed as long as inventory is available.
Deleting Products
To delete a product, go to your Products list and click on the trash can icon that appears to the far right of each item. You will be asked if you’re sure you want to delete that item before proceeding. You can also delete all of your products on a page at once by clicking “Select All Products Below” in the top left corner and then choosing “Delete” from the group drop down menu.
I have a personal PayPal not a business page is it required to have a paypal business page?
Also, I only have a business page and personal FB page no other VIP or shopify page. Will it be easy to import my business. Paparazzi jewelry?
Hi Milly, a business PayPal account is required but you can upgrade for free on their website. Also, only have a business page on Facebook is perfect, that’s all you really need to create BuyItLive sale posts and get your business up and running.
¿Como le añado un producto a un cliente?
Hola Maribella, puedes averiguar cómo agregar productos al carrito de un cliente en este artículo: https://support.buyitlive.co/knowledge-center/active-carts/