Collections are helpful when it comes to organizing your inventory. When products are sorted into collections, it’s quick and easy to create a sale that includes an entire collection or two. You can also ensure that shopping from your Storefront is simple and makes sense for customers. More organization will save you time, and time is money.
Creating a Collection
To start creating your own collections, first go to “Products” from the main page and then click on “Collections.” Select “Click here” to create a new collection. You’ll see this pop-up:
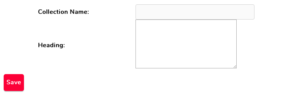
You’ll need to give it a name and a heading. These will be used as the menu title and description for that collection on your Storefront.
Use In The Storefront?
Your Storefront is like a personal website on BuyItLive and is available to BuyItLive Professional sellers. Once you add products to your Storefront anyone can go in and shop by clicking the link to your Storefront.
You can enable or disable a collection depending on what you want on your Storefront. To learn more about setting up your Storefront, you can check out this support article.
Adding Products to Collections
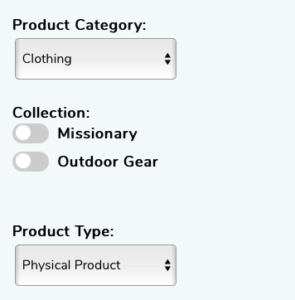
Once you’ve created any collections you want as part of your store, you can start adding products to them. To create a new product and add it to a collection, there will be a list of all available collections for you to select.
Simply select one or more of your collections and then make sure to hit “Save” at the bottom of the screen to save your product.
You can also add pre-existing products to collections by finding it in your products list and then clicking the “Edit” button on the far right. Again you’ll see a list where you can select a pre-existing collection.

Removing Products From Collections
To remove a product from a collection, you can follow the same steps directly above and edit the individual product from your inventory list. You can also click on the “Collections” tab and then select “View” next to your collection to see which products are included.
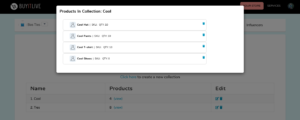
Simply click on the garbage can icon next to any item to remove it from that collection.
Adding A Collection To A Sale
Sorting products into collections can save you loads of time. Maybe you’re planning a sale for specific inventory or maybe you’re getting ready for a new product release sale. You’re in luck!
You have the option to add an entire collection of products to your sale with one simple selection. This option is available as you begin setting up your sale.
Deleting a Collection
To delete an entire collection, click on your “Collections” tab and find the collection you want to delete. Select the garbage can icon on the far right and remember: once you delete a collection, you will not be able to restore it. Deleting a collection will not delete the products within the collection.
Shopify Collections
If you import inventory from Shopify and select to “Import Products Within Collections,” the collection names also import to BuyItLive. You won’t need to edit your products to add them to collections because they will import with their collections still attached. Once imported, you can edit the collection Name/Heading and choose which collections will be available on your Storefront.
Read our article on Managing Inventory with Shopify to find out how to make edits to your Shopify products.