Maybe you’re new to selling online. Does building a website feel overwhelming? We’ve made it very simple. The Storefront allows you to display and sell items on a landing page. There is no commenting, live video, or social interactions, BUT customer carts are still timed. If you’re looking for a simple site to host all of your selling necessities, BuyItLive social selling combined with the Storefront is a one stop spot!
Create Storefront
You can create your Storefront under “My Store –> Tools or under your “store links” on your home page. The BuyItLive Storefront is only available to BuyItLive Professional sellers. Before setting things up here, make sure you’ve done these 2 things:
- Create collections
- Add products to your collections
To reiterate, only products that are in collections can be enabled on your Storefront. If you have a single product that you want added to your Storefront, you will have to add it to a collection first. Requiring collections makes your Storefront more organized and easier to navigate for your customers. If you aren’t sure how to add products to collections, you can find out how in this article.
Adding Collections to Your Storefront
The first thing you’ll do while setting up your Storefront is pick and choose what collections your customers can shop. You can choose one, a few, or all of your collections to be on your Storefront.
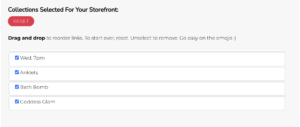
Hit “Next” at the bottom to create your Storefront! You’ll be able to see the collections you’ve added here.
Edit Storefront Settings
You can edit storefront-specific settings from your “tools” page once your Storefront is created. Select the pencil icon and you can adjust the following settings:
- Storefront – you can enable or disable your Storefront anytime. When disabled, customers will not be able to shop it.
- Checkout Timer Options – this adjustment is unique to carts created from customers shopping your Storefront.
- Guest Checkout – if you want customers to be able to shop without signing in, you’ll want to toggle this setting on.
- Display sold out products – if you want customers to add their names to the waitlist for sold-out products, then you can leave this setting toggled on.

View Storefront
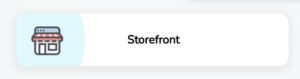
You can visit your Storefront to see how it appears for your customers using the Storefront button on your store’s home page.
Storefront Link
Once you’ve created your Storefront, you’ll want to share the link with your customers so they can go in and shop. You can find the link on your home page under your Store Links.